

Turn a Demo Into Product Launch Posts for Marketers (14 Day Templates)
Launch with a demo-first hero post, not a features list, and run it through a 10 to 14 day sequence of staged spikes instead of one big announcement day. The centerpiece is a single 30 to 90 second demo video, cut into formats for LinkedIn, Reels, Shorts, TikTok, and X, so one production session covers the entire launch week, as explained in Understanding Brand Launch Videos and Their Impact.
TL;DR:
- Launch posts should focus on showing the product solving a problem through a short demo video, rather than just listing features.
- A staged, 14-day launch sequence with multiple spikes outperforms a single big-day push by maintaining audience engagement over time.
- Pre-launch teasers like micro GIFs, UI snippets, and founder stories build anticipation, especially when paired with referral-driven waitlist campaigns.
- The hero post must stand alone with a clear outcome, using formats like demo videos or carousels, and be supported by intense engagement in the first hour.
- Small teams should prioritize the demo video, early supporter engagement, and pre-planning automation tools to execute a successful launch efficiently.
Table of Contents
- What Makes Product Launch Posts Actually Work?
- Pre-Launch Post Ideas That Build Real Anticipation
- How Do You Structure the Hero Launch Post?
- The 14-Day Launch Sequence and Checklist
- Adapting the Hero Post for LinkedIn, Reels, Shorts, X, and TikTok
- Caption Templates and CTAs That Actually Get Used
- Winning the First Hour After You Hit Publish
- Building a Launch Brief to Keep Messaging Consistent
- What Goes in Your Post-Launch Follow-Ups and Recap Posts
- How Influencers and Partnerships Can Extend Your Reach
- Handling Negative Feedback and Product Issues After Launch
- Legal and Compliance Points to Check Before You Post
- Author Perspective: What Small Teams Should Actually Cut
- Speed Up Launch Posting With an AI Social Manager
- Sources
What Makes Product Launch Posts Actually Work?
Most launch posts fail for the same reason: they tell instead of show. An analysis of 3,000 viral SaaS product launch posts found that the posts generating real reach almost never open with a feature bullet list. They open with the product solving a visible problem, usually in a short clip or a before-and-after frame, and the caption gets out of the way.
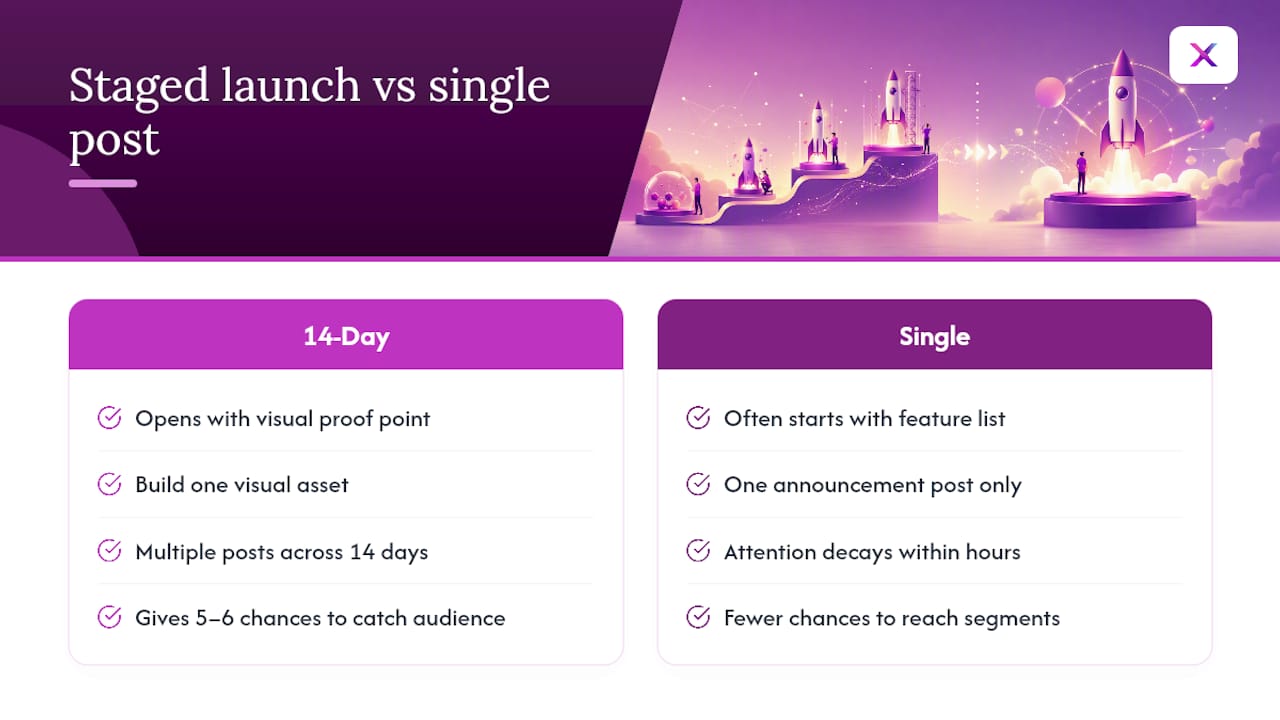
That distinction changes how you should plan production. Instead of writing five different announcement posts, you build one visual proof point and rebuild the copy around it. A 14-day staged launch sequence consistently outperforms a single “big day” push because attention on anyone post decays within hours, and a sequence gives you five or six chances to catch different segments of your audience at different moments.
The standard industry term for this whole workflow is a product launch social plan: the calendar, asset list, and messaging brief that keeps every post you publish pointed at the same outcome. “Product launch posts” is really shorthand for the individual pieces that plan produces. Get the plan right and the individual posts practically write themselves.
Pre-Launch Post Ideas That Build Real Anticipation
Two to four weeks out, your job is not to announce, it’s to warm people up so the launch-day post lands in front of an audience that’s already curious. Vague “something’s coming” teasers rarely convert into waitlist signups. Specific, partial reveals do.
Three teaser formats consistently perform well:
- Micro GIFs showing three to five seconds of the product in motion, cropped tight enough to spark curiosity without giving away the full experience.
- Cropped UI demos where you show a corner of the interface or product and ask followers to guess what it does.
- Founder micro-stories (30 to 60 seconds, shot on a phone) explaining why you built the thing, told as a problem you personally had.
Pair teasers with a waitlist that has a referral mechanic built in: moving up the list, or unlocking early access, in exchange for sharing. Tools like a simple form with a shareable link are enough; you don’t need a dedicated growth platform for a small launch.
Place teasers across Instagram and TikTok Stories, relevant Slack or Discord communities you’re already active in, and an email to your existing list. Plan for four to six pre-launch posts spaced two to three days apart, not stacked back to back, so each one gets its own moment before the next one lands.

Pro Tip: Save your best teaser clip for launch day itself, re-cut with the reveal added. Followers who saw the tease will recognize it instantly, and that repetition is part of what makes the payoff land.
How Do You Structure the Hero Launch Post?
Your hero post is the one asset that has to work on its own, with no context, for someone scrolling who’s never heard of you. That means it has to show the outcome, not describe it.
Three formats cover almost every situation:
- Single demo video (30 to 90 seconds): the strongest default, especially for LinkedIn and as the source clip for every other format.
- Carousel walkthrough: five to eight slides moving from problem to result, strong for Instagram and LinkedIn audiences who scroll rather than watch video.
- Thread with an embedded clip: works well on X, where you can pair a short video with three or four lines explaining the “before” state.
Cap your caption at one sentence describing the outcome, followed by one clear call to action. Not two. A post asking people to “check it out, sign up, and share” gives them permission to do none of those things.
The first five minutes matter more than most people realize. Front-loaded engagement in the first 30 to 60 minutes is one of the strongest signals platforms use to decide how far a post travels, which is why lining up 15 to 20 people to comment and react in that window matters more than any copy tweak.
The 14-Day Launch Sequence and Checklist
A single launch-day post fights an uphill battle against how fast attention fades online. A staged sequence spreads that risk across multiple moments, each one rebuilding momentum before the last one fully fades. That’s the core logic behind the 14-day, multi-spike launch sequence most successful launches follow: tease, build a waitlist, launch, then follow up, rather than betting everything on one day.
Here’s how five major spikes map across two weeks:
- Days 1 to 4: Teaser posts and waitlist push across Stories, communities, and email.
- Days 5 to 8: Behind-the-scenes content and a countdown post, building urgency without revealing everything.
- Day 9 or 10: Launch day. The hero demo post goes live, timed for a Tuesday, Wednesday, or Thursday morning when engagement tends to run highest.
- Days 11 to 12: Social proof spike. Customer reactions, press mentions, or early usage numbers.
- Days 13 to 14: Recap and reminder spike, closing any remaining hesitation before interest drops off.
A five-email ladder should run alongside these spikes: a heads-up email, a waitlist confirmation, a launch-day announcement, a social proof follow-up, and a last-chance reminder. Send the launch email within an hour of the public post, not before, so your list feels like insiders rather than an afterthought.
Before day one, confirm you have:
- The finished demo video, cut into your platform formats
- A live landing page that matches what the demo shows
- Your 15 to 20 supporters briefed on when and what to comment
- UTM parameters on every link
- A tracking plan for signups, clicks, and shares
Adapting the Hero Post for LinkedIn, Reels, Shorts, X, and TikTok
One master capture, exported into native formats, is the fastest way for a small team to cover five platforms without five separate shoots. Producing a single 60 to 90 second demo and exporting platform-specific cuts is now the standard operational shortcut, replacing the old approach of filming separately for each channel.
If time is tight, a two-cut minimum (one LinkedIn 16:9 anchor and one 9:16 vertical remix) covers your highest-traffic channels. The full five-cut version is worth the extra hour of editing once you have the master file, since the incremental cost per format drops fast after the first export.
Caption Templates and CTAs That Actually Get Used
Your first line has to earn the rest of the read. On LinkedIn, open with a specific number or outcome: “We cut X down to Y.” On TikTok and Reels, open with a question or a visual cue in the first two seconds, since the caption barely gets seen before the video plays.
A few structures worth copying directly:
- Founder story: “I built this because [specific problem]. Here’s what changed.” Works best paired with the demo clip, not a static photo.
- Customer proof: “One of our customers used to spend [time/cost]. Now they don’t.” Strong for the social proof spike around days 11 to 12.
- Template giveaway: “Here’s the exact [checklist/template] we use, free.” Value-first resources like templates and swipe files travel further than plain announcements, and they give people a reason to share beyond just liking your product.
Close every caption with one CTA, not a menu of options. “Try it free” beats “sign up, share, and comment below.” Keep hashtags to two or three on Instagram and TikTok, skip them almost entirely on LinkedIn and X, and lean on the tactical basics: a branded hashtag, a countdown, and consistent native formatting across every post.
Pro Tip: Draft three caption variations for the same hero video, then pick the one that reads well out loud in under ten seconds. If you stumble reading it, your audience will scroll past it.
Winning the First Hour After You Hit Publish
The first 60 to 120 minutes decide most of what happens next. Coordinate who posts when: the founder or store owner shares first, employees and close supporters reshare within 15 minutes, and a wider ask goes out after that initial wave shows signs of traction.
Priorities for that window:
- Reply to every comment within the first hour, even a one-word reply, since early replies signal an active post to the platform.
- Assign one person to moderation so questions and complaints get answered fast, not three hours later.
- Hold paid retargeting until you see organic traction, then layer it in day two or three rather than launch morning.
- Set UTM parameters and event tracking before you publish, not after, so you can see exactly which spike drove which spike in traffic.
What kills reach fastest is silence in that first hour. A post with zero comments or reactions in its first 30 minutes reads as low-signal to most algorithms, which is exactly why mobilizing 15 to 20 supporters ahead of time matters more than almost anything else on this list.
Building a Launch Brief to Keep Messaging Consistent
A short launch brief, two to three pages, stops your team from publishing 14 slightly different versions of the same claim. Include the one-line outcome, every claim with its source, the finished asset list, and a response plan for questions or complaints.
- List what you will not claim, not just what you will.
- Have one person sign off on claims before anything posts.
- Pull real customer language from support tickets or reviews rather than paraphrasing from memory.
Pro Tip: Keep the brief in one shared doc, not scattered across Slack threads. When someone asks “can we say X,” the answer should take ten seconds to find.
What Goes in Your Post-Launch Follow-Ups and Recap Posts
The week after launch day is where most teams go quiet, right when they should be doing the opposite. A recap post around day 13 or 14 closes the loop for anyone who saw the teaser or the launch post but didn’t act yet.

Good recap posts do three things: share a real number (signups, units sold, five-star reviews), thank the people who showed up early, and repeat the CTA one more time with a small twist, like a limited-time bonus for people who missed the first wave. If your launch had a rocky moment, the recap is also where you close that loop honestly, which builds more trust than pretending it didn’t happen.
A second, smaller wave of follow-ups works well two to four weeks after launch: a “here’s what people are saying” post pulling in early reviews, a short video showing an unexpected use case a customer found, or a “we just crossed [number]” milestone post once you actually have one worth sharing. These don’t need the same production effort as your hero asset. A quick screen recording of a customer message or a review screenshot, captioned well, often outperforms anything more polished.
Space these out rather than dumping them all in one week. A single well-timed recap plus one or two follow-ups over the following month keeps your launch showing up in feeds without looking like you’re still trying to convince people a month later.
How Influencers and Partnerships Can Extend Your Reach
Influencer and partnership pushes work best when they run parallel to your own sequence, not instead of it. Send your demo video and key talking points to any partners two to three days before launch, not the morning of, so they have time to make it feel native to their own audience instead of a copy-paste ask.
Micro-creators with smaller, tightly matched audiences generally convert better for a first launch than a single big-name partner, mostly because their followers trust product recommendations more and the content itself reads less like an ad. Give partners the raw demo footage and a couple of caption angles rather than a locked script. Content that sounds like the partner wrote it outperforms anything that reads like it was handed down.
Coordinate timing so partner posts land during your social proof spike, around days 11 to 12, rather than on launch day itself, when your own channels are already carrying the load. That staggering gives your launch a second wind right as organic reach from the initial post starts to taper off. If a partner has an audience that overlaps heavily with an existing customer base, ask them to frame their post around a specific use case rather than a general endorsement. It reads as more credible, and it gives their followers a concrete reason to click.
Track partner-driven traffic separately with its own UTM parameters. Without that, you’ll have no way to tell whether the spike in signups came from your recap post or from a partner’s story that went out the same afternoon.
Handling Negative Feedback and Product Issues After Launch
Every launch surfaces at least one problem you didn’t catch in testing. How you respond publicly matters more than the issue itself. Acknowledge the problem in the same channel where it was raised, within hours rather than days, even if the fix itself takes longer.
A short, direct comment beats a defensive one. “You’re right, we’re looking into this now” holds up better over time than an explanation that sounds like an excuse. If the issue is widespread enough to affect a meaningful share of your new users, a dedicated post addressing it head-on, rather than letting it get buried in comment replies, shows more control than staying silent.
Route anything technical, or anything from a visibly upset customer, to a person rather than a template response. Copy-paste replies to specific complaints tend to make things worse, not better, because they read as dismissive even when they’re not meant that way.
Keep a running log of recurring complaints during the first week. If three people flag the same bug, that’s not three isolated issues, that’s a pattern worth a public update before it becomes a bigger story than your launch itself. And resist the urge to delete critical comments unless they violate an actual policy. Visible, well-handled criticism usually builds more trust than a comment section that looks suspiciously clean.
Legal and Compliance Points to Check Before You Post
Launch posts move fast, which is exactly when compliance gets skipped. A few checks are worth building into your brief rather than trusting memory on launch morning.
Any performance claim (“saves you 8 hours a week,” “cuts costs by half”) needs a real source behind it before it goes in a caption. Regulators in multiple markets treat unsubstantiated commercial claims as a real enforcement risk, not a technicality, so keep the backup data attached to the brief itself.
If a partner or influencer is posting about your product in exchange for anything of value, free product, payment, or early access, that relationship generally needs to be disclosed clearly in their post, not buried in a bio link. Rules on how that disclosure has to look vary by country and platform, so check the specific requirements for wherever your partner’s audience is based rather than assuming one format covers every market.
Music, stock footage, and third-party logos in your demo video all carry licensing terms that a countdown timer won’t wait for you to check. Confirm rights before the video goes live, not after a takedown notice arrives. And if your launch mentions specific customers by name or shows their data in a testimonial, get sign-off from them in writing, even if the quote came from a casual conversation. A verbal “yeah, sure, use it” is not the same as a documented approval when someone later asks you to take it down.
Author Perspective: What Small Teams Should Actually Cut
If you’re a team of one or two, don’t run the full 14-day sequence on faith. Compress it to seven days by merging the teaser and waitlist phases, and to three days by skipping the countdown entirely and going straight from one strong teaser to launch. What you can’t skip is the demo video and the first-hour supporter push. Everything else is negotiable.
Pay for outsourced help on video cuts before you pay for community management. A rough edit from a freelancer beats a polished one that arrives after launch day, and a founder replying personally in hour one usually outperforms a hired moderator anyway.
— Toby
Speed Up Launch Posting With an AI Social Manager
Building five platform cuts, a caption ladder, and a 14-day posting calendar by hand is exactly the kind of work that eats a launch week. Xyla AI turns a product listing into reels, carousels, and caption drafts automatically, so a Shopify, WooCommerce, or Etsy store owner can produce the LinkedIn, Reels, Shorts, TikTok, and X versions of a hero demo without booking a video editor.
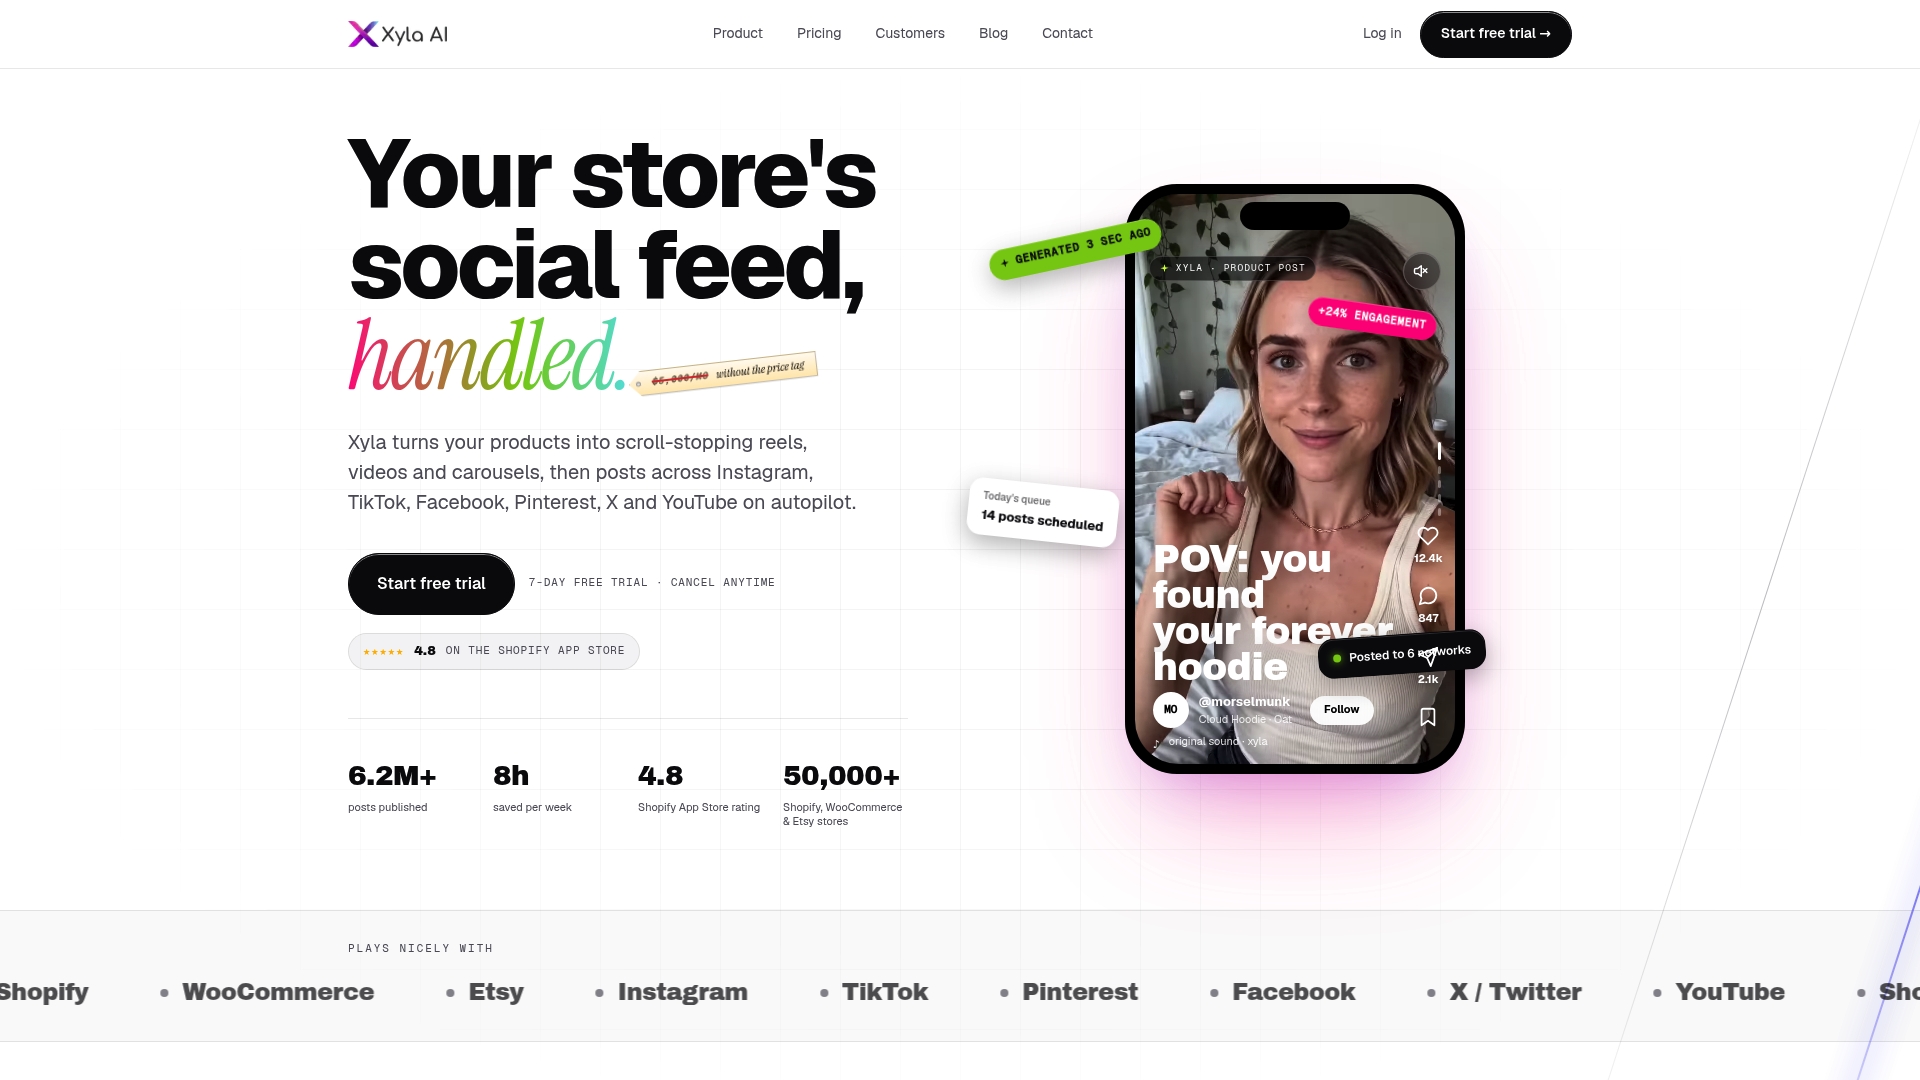
Store owners using Xyla AI typically save around eight hours a week that would otherwise go into manual content creation and scheduling, time that matters most in the two weeks around a launch when every post needs to go out on schedule. The platform also handles the AI UGC video generation piece directly from your product photos, which covers the single master capture and multi-format export workflow this entire sequence depends on.
If you’re planning a launch in the next month, start by mapping out your automated social media workflow with Xyla AI so your 14-day sequence is scheduled and ready before day one instead of assembled the night before.
Sources
- Lessons from 3,000 Viral SaaS Product Launch Posts | Socialmon (Medium)
- How to announce a product launch: 2025 playbook | Flowjam
- 10 tactics for launching a product using social media | Canva
- Product launch social media playbook: 8 tactics for 2026 | Arcade


